Cody Chen
Projects, Experiences, and Other Such Matters
 Hi, welcome to my website! It's a combination of a resume and a portfolio for some of the projects that I've done. I graduated from Tufts University in 2015 with a B.S. in Computer Engineering. Some of my notable interests lie in the fields of robotics, electronics, VR, sustainability, earth sciences, kinetic art and computer architecture. If you've got any questions feel free to reach me at:
cdy.chn@gmail.com
Experience
Tufts University Summer 2015:
Researcher
Worked for the Avedis Zildjian Company, the world’s leading and oldest manufacturer of cymbals. A researcher on a small team of students designing an embedded system to perform signal processing and acoustical analysis in order to discern qualitative information about a cymbal hit.
Researcher
Tufts University Summer 2014:
Continued work on a project in the Tufts Signal Processing and Robotic Networks lab for low power aerial surveillance. As part of a joint effort with the University of Maine in Orono we did experiments to explore drones as automated monitors for passive sensors on the walls of a lunar habitation module. Worked on controls, vision and firmware applications.
Hardware QA Intern
Amazon Robotics 2013:
An intern for the hardware quality assurance team at Amazon Robotics, formerly Kiva Systems. Designed and programmed scripts to execute life-testing routines. Performed experiments to test for hardware interferences and possible vulnerabilities.
Projects
Laser Cutter Upgrade
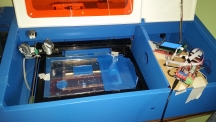
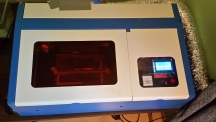
Anyone who has experience with rapid prototyping with the sorts of machines found in makerspaces can attest that laser cutters are super useful. Not only are they good for prototyping, they can even be used in small scale manufacturing and they can be used with a much greater variety of materials than 3D printers. Professional grade laser cutters can often run for prices of thousands of dollars. Fortunately, it is possible to buy much cheaper Chinese models from ebay.
These off-brand models are often bare-bones, with little documentation and no customer support. The software is poorly translated, not well supported and locked with a failure-prone USB drive key. Fortunately there is a small community built around upgrading and customizing these machines. They have broken out the control pins for the laser power supply, as well as the controlling X and Y axis stepper motors. This makes it possible to completely replace the control board with another microcontroller which interfaces with these elements.
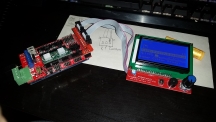
With help and code from github user Turnkey Tyranny , I replaced the control board with an Arduino Mega and a Ramps 1.4 shield, which controls the stepper motors. This new setup allowed me to connect with a computer and send GCode, a type of language for controlling CNC machines. Now, users can design patterns in any software compatible with .svg (scalable vector graphics) files, instead of having to design patterns in the aforementioned proprietary software. Results thus far have been successful, the next thing to do will be to add an adjustable z-axis print bed and air assist!

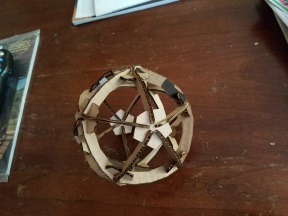
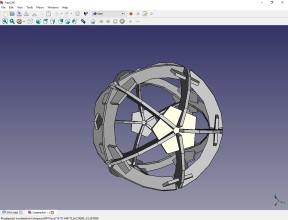
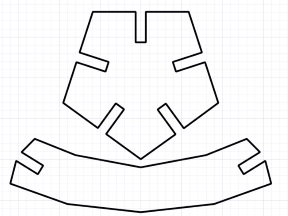
Laser Cut Icosahedron
Sometimes you just want to play with cardboard and laser cutters. I figured why not an icosahedron (or dodecahedron depending if you count the small pentagons). Adam Savage says that all of making is turning 2D into 3D (paraphrased) and that everyone should play with cardboard for a spell. Is this cheating?
The Cube Box
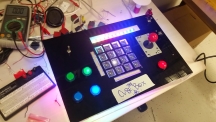
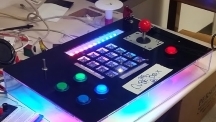
This cube based instrument (informally titled "The Cube Box") was the final project for the Electronic Musical Instrument Design class of spring 2015. To play, one arranges a set of colored cubes on a 4x4 grid and uses a joystick to guide a cursor of light. As the light passes under the cubes the instrument plays a note that depends on the color of the cube.
The electronics are built around an Arduino Mega. It uses 16 Adafruit I2C color sensors with a multiplexed data line. There is a joystick to control the direction of the light, as well as an array of other buttons and sensors to control things like mode, pitch, tone, and key. There is also a recording mode which allows one to record a series of notes and the play them back such as a looper pedal for guitar.
Medical Mobile Device w/ App
A medical device capable of taking EKG and pulse, and temperature readings. Passed JSON strings to an accompanying iOS application to display aforementioned data.
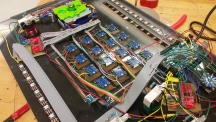
Cymbal Analyzer
See Above
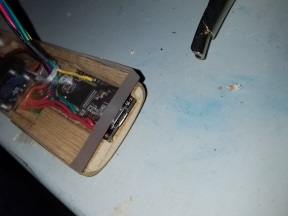
Cymbal Analyzing device. Shown are the microphone mounting system and the FPGA and real time machine used for the signal processing.
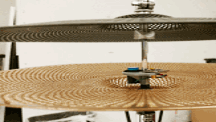
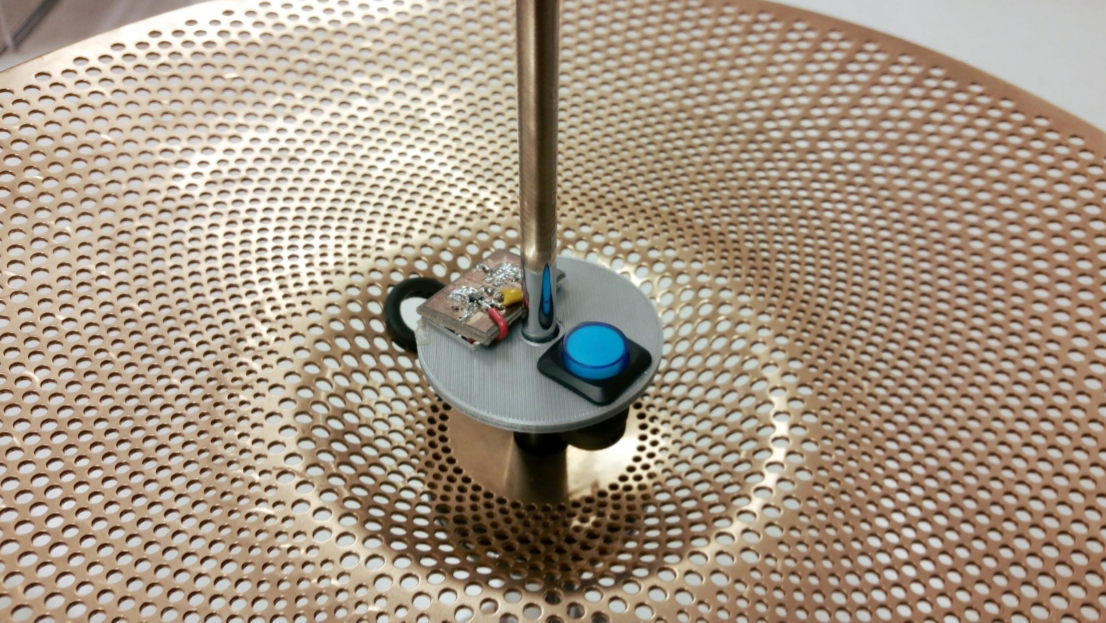
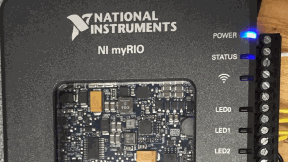
See 'Work Experience' above
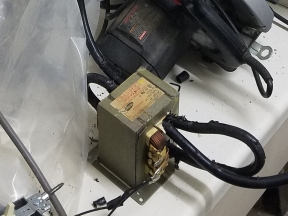
Spot Welder
An "MOT" or Microwave Oven Transformer built spot welder. By taking standard 115v AC wall current and turning down the voltage using a modified microwave oven transformer, I built a very simple spot welder. I replaced the secondary winding with an absurdly thick 0/2 AWG stranded copper wire, dropping the effective voltage to rougly 3V and amping up the current accordingly. By placing two pieces of ferrous metal between the solid copper conductors then turning the machine on in quick bursts, one can resistance weld on the cheap.

Arduino YUN Drone Pilot
Device to autonomously fly a Parrot A.R. Drone using custom sensors.
A.R. Drone Lunar Module Monitor
A research project with the Tufts Signal Processing and Robotic Networks lab. Used an openCV to view 2D barcodes containing flight path instructions for the Parrot A.R. drone.
VLSI Adder
Carry Lookahead Adder designed in Cadence virtuoso. 2-stage Sum of Products style lookahead.


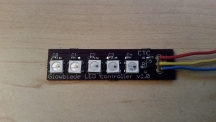
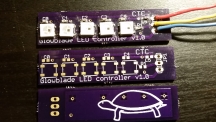
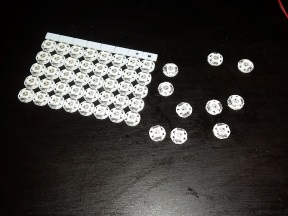
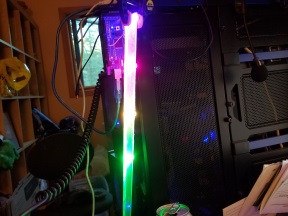
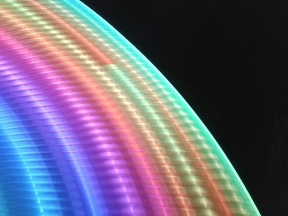
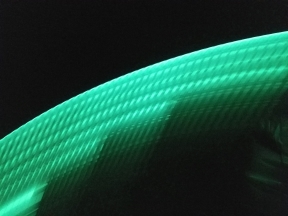
Glowblade
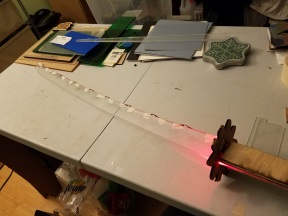
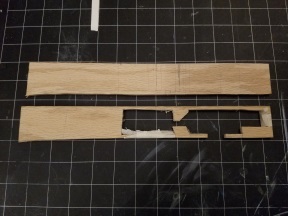
I had a rough cut of the blade done but I finished it up on a tablesaw with a plexiglass cutting blade. Gave a lot of control to the final shape, and it came out quite nicely and very strong. I'm using a material called Acrylite Resist 65, an acrylic designed for strength and durability. It has amazing properties: very strong yet flexible and seemingly shatter reistant. I've accidentally smacked all sorts of things when testing the sword out and it has yet to chip, or break.
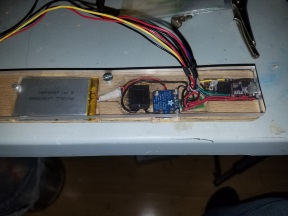
Originally the plan was to have a small bank of LEDs in the handle, leaving the entirety of the blade free from electronics or wiring of any sort. Initial tests with glowblade v1 smd showed that there just wasn't enough light with only 5 LEDs. I wanted to avoid running LED strip down the back because I wasn't a fan of the aesthetics, but in the end I compromised by doing it with 26 GA wire, which has a smaller profile.
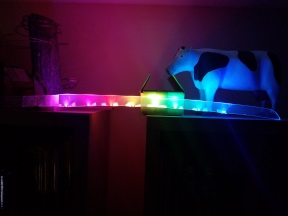
Once the LEDs came in I soldiered them together and taped them to the back of the blade.


Photos
To be added